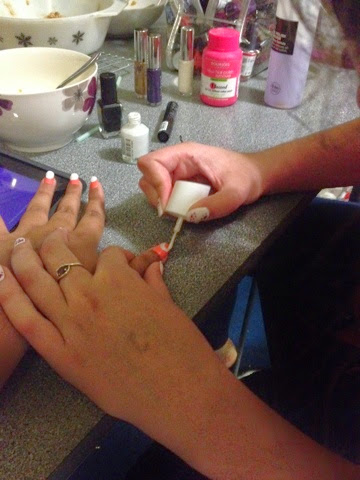
Friday, 1 August 2014

Go on England!!!

Ok I know it's been saw while but I have been so busy with work and holidays and everything but I'm ready to blog again!!! 
I know the World Cup seems like ages ago (and England didn't do all that great) but you still have to be patriotic and support your country so here are my supportive gland flag nails!!! 


There are two ways of doing this design but I will explain both ways :) 
As always I started with my base coat and then two coats of my colour coat which of course has to be red for England!!


Once those are all dry (especially your fourth finger) you can then start to do your England flag!! 


To do this I used just some black tape (which I found in a draw at home) you can use scotch tape or Sellotape or there are special nail art things to use but I find that this tape worked just as well. 


So to do the England flag, I cut out two strips of the same width and long enough to go across my nail and placed them onto my nail to create a cross. 


Once they are both on and stuck down well I painted over the nail including the tape in white.
Two coats are probably needed to do this. 


Now.... WAIT
you need to make sure that all the nail varnish has completely dried in order for you to take of the tape smoothly with a nice neat line 

That is one way to do it!!! The other way is pretty much the same but the other way round!! 


Paint the nails white... Let them dry then put two strips of tape on your nail and paint in bit in the middle... Let that dry completely then do the same the other way to create the cross! 

As always, once finished, complete with a top coat and there you go!!! England nails!! 


Wednesday, 4 June 2014

It's summer ball time!!!

My first summer ball at Canterbury Christ Church University is this week and of course I had to do my nails! My dress is blue so of course I went for nails that would stand out! So what's better than bright pink and glittery eh? 


I went to Westfields at Stratford and came across heaven for me! A shop all of nail varnish! Even the shop was in the shape of a bottle of nail polish! This was a modelsown stall and they had an amazing deal of 6 items for £20 and 2 free eyeliners!! I found that absolutely amazing so of course I had to get some!! 
I used one of their items to create these amazing nails and that's using their Artstix duo polish! Such an amazing creation!! 


I started off by applying a base coat (also from modelsown, it's a 5 in 1, base an top coat) then two laying of the pink nail varnish and then let that dry 


Then using nails inc special effects holographic glitter nail varnish and put a bit of it on the bottom of my nail and used a makeup sponge to gently spread the nail varnish up my nail 


This is what it looked like after! Then I did the same again with the glitter end of the duo polish as these are larger bits of glitter which I also liked to create this effect! 
Then finally once that has dried, i added another later of the nails inc glitter polish at the bottom to create a more distinct gradient look! 
Finish with the top coat again and there you have gradient glitter nails ready for summer ball!!! 


Tuesday, 20 May 2014

Diamonte flowers!


My amazing mum bought me some lovely diamonte pieces for nail art and I finally had the chance to sue them! So here they are: flower nails!!! 

First apply a clear base coat and then apply your chosen base colour (two if needed), I have chosen a lovely gel finis pink by Avon 


Once that is dry, you can create your flowers!!! 
Using a hair grip carefully just put a drop of nail varnish on your nail and that is the centre of the flower 


Then add 5 dots around that dot to create your flower using the hair grip 


Once that is done, you need to add your diamonte to the centre of the flower before the nail varnish dries otherwise the diamonte will not stick. I used a special tool to pick it up with but it can be done with a toothpick 


Apply it carefully and the middle of the flower and lightly press down to fix it in place 


Do this to all your nails and there you go! 

You can add small dots around the flower to make it even more creative if you wish! 

But there you go! Creating flowers with hair grips and diamonte!!! 


Sunday, 4 May 2014

Creative leopard nails

I've done a normal leopard print before but this is a different take on it in a different pattern and different colours (on my housemate) 
The basics of the design are the same, start with a base coat and colour on your nails but with this design you can choose several colours (I would advise no more than 4) 

Once your base coat is dry apply your colours using a bobby pin or dotting tool and shape them to look like a leopard print. Spread out the colours too so that you don't have too many of the same colour near each other and only apply the dots diagonally across half the nail. 
Do this to all your nails so it looks like this 
Let this dry then do the black outline (I use a nail art pen) 
When you have finished this stage you can draw dots in between the leopard prints to create more of a distinct effect 
Once they have dried, apply the top coat and there you have a creative way of doing leopard print nails!!! 


Saturday, 3 May 2014

Pandas!!!

Ok so my housemate is obsessed with phone cases and her current one is a pig but she wants to change it to the panda.. This was the inspiration for these nails!! 

These are the things you'll need to create the panda nails 
If you want you can have a base colour but you don't have to. 
The first part of the panda comes from the face so paint half the nail In a large semi-circle 
Fill in the semi circle so that half the nail is painted and do this for all the nails till it looks like this 
The next stage is the ears which you can do once the face has dried. 
One it's all dried get some nail varnish on your bobby pin (or dotting tool) and put a dot on the nail in the position and size of an ear, you can always make the ear bigger by spreading the nail varnish around 
The next stage is the eyes and nose! (This can be very tricky if you have small nails but it can be done!!!) 
Put 2 small dots on the face for the eyes and one below in the middle for the nose 
Let these dry then you can add detail to the eyes if you wish
This stage is super tricky if you don't have the right tools and for this I use a nail art brush but even with that it still takes a steady hand and a lot of patience 
Once you have added detail to the eyes you have completed your panda nail art and there you have it!! (apply top coat after painting nails) 


Friday, 2 May 2014

Animal lover nails!!


It's nail time again!!! This design was inspired by my close friend Sophie who is a huge cat lover and I am a massive dog lover and these loves has resulted in paw print nails!! 


As always apply a base coat so it doesn't damage or stain your nails then apply your base colour (2 coats if it isn't that thick) 


Then choose your colour for your paw prints!! And make sure you have something to apply them with, either a hair grip or a proper nail dotting tool

The first part of the paw print is the bottom part, you can do just a large dot if the actual shape is too tricky but to do the proper paw shape draw two small diagonal lines upwards and meeting in the middle then fill them in so it looks like an upside down heart 


Then to finish off the paw print draw four dots above the part you have already painted so they should end up like this 


You can do as many paw prints in any pattern as you like to make it look as creative as you want 

One you have finished all your nails and let them dry, don't forget to put on a top coat so it won't chip 

But there you have it! Paw print nails!!! 

Monday, 28 April 2014

Water colour nails!


The nail blogs are back and with one that I really love though it is quite tricky! 
Water colour nails!!!


Now this is quite am messy nail design so I would advise putting scotch tape around your nail to avoid getting nail varnish on your finger (I didn't do it so don't worry if you don't have any, you can easily use nail varnish remover to tidy  it up!) 

Here we go!! 


To create this effect you will need a plastic cup filled with room temperature water (this temperature will allow the nail varnish to spread and merge in the water) 
You will also need a few different colours of nail varnish, the amount of colours you can use is totally up to you, I only used 3 here, pink, purple and yellow 


paint your nails white, this is like a base coat for your chosen colours to set on and show bold on your nails


Get the nail varnish and drop one blob of nail varnish in the centre of the water (it should spread out, if not then the water is not warm enough) 


Then add the next colour, aim the drop in the centre of the colour that is already in the water 


Keep adding your colours into the centre until you are satisfied with the amount of layers there are (don't take too long though because the nail varnish will start to set on the water) 


Next get a toothpick or a bobby pin and use it to swirl the nail varnish around to create a cool pattern 


Once you are happy with the pattern, stick your nail in the pattern and keep it there for about 20 seconds 

Once the nail vanish on the water is dry, use the bobby pin (or toothpick) to wipe up the nail varnish on the water 


Once that's done you can take out your nail and continue the process with all the other nails and once you are finished they will look something like this!!! 


Remove the any nail varnish that is on your fingers and there you have perfect water colour nail art!!!