Monday 28 April 2014

Water colour nails!


The nail blogs are back and with one that I really love though it is quite tricky! 
Water colour nails!!!


Now this is quite am messy nail design so I would advise putting scotch tape around your nail to avoid getting nail varnish on your finger (I didn't do it so don't worry if you don't have any, you can easily use nail varnish remover to tidy  it up!) 

Here we go!! 


To create this effect you will need a plastic cup filled with room temperature water (this temperature will allow the nail varnish to spread and merge in the water) 
You will also need a few different colours of nail varnish, the amount of colours you can use is totally up to you, I only used 3 here, pink, purple and yellow 


paint your nails white, this is like a base coat for your chosen colours to set on and show bold on your nails


Get the nail varnish and drop one blob of nail varnish in the centre of the water (it should spread out, if not then the water is not warm enough) 


Then add the next colour, aim the drop in the centre of the colour that is already in the water 


Keep adding your colours into the centre until you are satisfied with the amount of layers there are (don't take too long though because the nail varnish will start to set on the water) 


Next get a toothpick or a bobby pin and use it to swirl the nail varnish around to create a cool pattern 


Once you are happy with the pattern, stick your nail in the pattern and keep it there for about 20 seconds 

Once the nail vanish on the water is dry, use the bobby pin (or toothpick) to wipe up the nail varnish on the water 


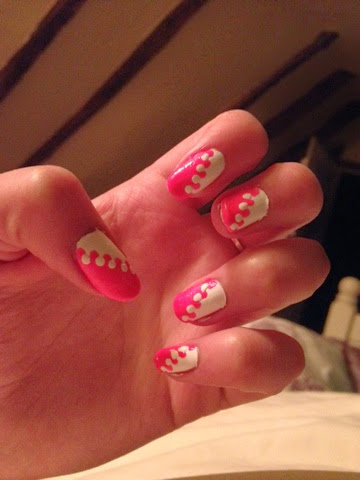
Once that's done you can take out your nail and continue the process with all the other nails and once you are finished they will look something like this!!! 


Remove the any nail varnish that is on your fingers and there you have perfect water colour nail art!!! 

Saturday 26 April 2014

Term 3 of University begins!!

My life may seem like it revolves around nails but I do actually do other stuff!! I am currently at Canterbury Christ Church University and have just done my first week back in Term 3! And what a week it has been! 

I came back later than everyone else (had other commitments which was only going to see the amazing Gary Barlow!) so this was my first day back at UNI and what a welcome!! 


Pre drinks with these two amazing people and what is pre drinks without selfies?! 


I was finally reunited with my bestie Hilary! (Never leave me again!) 


And the fun jus kept on coming when I was reunited with all my UNI girls on my course!!! What a lovely first night at UNI! 


So that was Wednesday... But on Friday it was my lovely friend Jordan's 20th birthday!!! (He's the REALLY tall one at the back) and yet again I got to see even more of my friends that I haven't seen in a month! 


And again... What's a night out without the pre outing selfies!? 

I don't know what I would do without this girl, I've only known her for 7 months but it feels like I've known her forever!!! <3 


This occasion even got my other housemate out with us!!! 


And here we all are, the only remaining housemates of 7 Hamill that have been here since the beginning! We've had out ups and downs (mostly ups) but I love them both dearly and I don't know what I would do if I didnt have them in my life! And I know I am not living with you net year (sad face) but don't think that will stop me from seeing you like EVERY DAY!! I love you my girlies!!! ❤️


I also got my other girls out too! It well an truly was a brilliant night with all my friends! 


So that was the first Friday night back at UNI and Jordan I hope you had a lovely birthday! 

(I'll get back to my nails now for my next creative design for a blog! All suggestions welcome!) 

Monday 21 April 2014

Interlocking Nails

Here is my guide how to create interlocking nails! 


All you will need is the basics (base and top coat), your chosen two colours to interlock and a hair grip! 


First apply you're first colour (twice if needed) and let to dry 


Once your first colour has dried, get your second colour and draw a diagonal line from one corner of your nail to another and paint one half in as shown in the above picture 


Next, with your hair grip, get a decent amount of nail varnish on the bobble but at the end, enough to make a decent sized dot


Apply your dots along the diagonal line evenly to create this effect and let to dry 


Then repeat this step but with your first colour and on the other side of the diagonal line. You can now see the interlocking of the two colours! Allow this to dry and then apply your top coat! 

And there you have it! Two Interlocking colours nail pattern! 

Wednesday 9 April 2014

Leopard Nails!

Hi everyone! This is my first ever blog so I hope you like it! (But im still learning how to use this). Im sure as my blog progresses you will all learn how much I love painting nails so I thouht it would be good to show you all my latest design.... LEOPARD PRINT NAILS!!  
 
 
These are the items you will need... (obviously if you wish to do other colours then use those)
 
 
Always best to start wit nail varnish free nails! File them to get the shapeyou require then apply a base coat to avoid staining and damaging your nails

 
Then apply your base colour

 
Apply two layers if you wish for a more even look

 
For th next stage you will need your other chosen colour and something to apply it with (I find a kirby grip is very useful fo dots but there are proper nail items to use for this type of application). Rememr to let your base colou dry before continuing to the next stage

 
Apply dots onto your nail either straight from the brush or using the grip by collecting some nail varnish on the ball at the end of the grip

 
Then use the grip so spread the nail varnish dos into a leopard prin shae

 
Do this to all fngers then leave them to dry

 
This next stage is when you really start to notice the leopar print forming however it does require a steady hand! Carefully draw two black lines around the shape you have formed but not completely round. This step can either be used with a nail art pen (what I use) or a simple blck nail varnis but this woul have to have a thin brush

 
The final stage of creating your leopard print nails is simply making dots around your nails (all different shapes and sizes)

 
Don't forget your top coat!!!


And there you have it! Leopard print nails!!!